Object oriented Programming
In this section we'll use structure our code as objects. It may be a good idea
to first review the introduction to struct.
An object (used interchangeably here with struct and class) contains two things:
- Variables, also known as state.
- Methods, which can act on this state.
These are defined in the struct block and the impl block respectively. These are
defined for any instance of this class. Specific instances (variables) of the class,
where you use let variable: Class = Class::new() have specific values for each of their variables.
Variables should typically not be accessed directly, and instead use methods to read or write their values.
It is common to define a public (pub) new() method to create an instance of the class.
This may compute the state from some of the arguments. For example:
#[derive(Debug, Default)]
struct Cat {
    name: String,
    age: usize,
    tabby: bool,
}

impl Cat {
    pub fn new(name: &str, age: usize, pattern: &str) -> Self {
        let tabby = if pattern == "stripes" {true} else {false};
        Self {name: name.to_string(), age, tabby}
    }

    pub fn age(&self) -> usize {
        self.age
    }

    pub fn year_passed(&mut self) {
        self.age += 1;
    }

    pub fn is_tabby(&self) -> bool {
        self.tabby
    }
}

pub fn main() {
    let martha = Cat::new("Martha", 6, "stripes");
    let annie = Cat::new("Annie", 7, "tuxedo");
    println!("{:?} {:?}", martha, annie);
}
Methods usually take a reference to self
to allow access to the state, with mut if any of the state is changed.
The return type of new() should the the type of the class itself, i.e. Cat.
Using the keyword Self (note the capital) is the same in the above example of
writing Cat, but with the advantage that if the class name is ever changed this doesn't
have to be updated more than once.
Deriving Debug lets us print the contained values with the debug directive {:?},
deriving Default allows a default (empty) value of the class to be set.
You can also make a new class directly by defining all of its state:
#![allow(unused)]
fn main() {
struct Cat {
    name: String,
    age: usize,
    tabby: bool,
}

let martha = Cat {name: "Martha".to_string(), age: 6, tabby: true};
}
But it's usually better to define a new() method (sometimes known as the constructor)
so you have more control.
More advanced uses
We will not use these here, but the following are common in object-oriented programming.
You may sometimes also use inheritance, where objects have relationships like
parent and child sharing some of their variables and methods. An example
would be a parent class Animal with variables legs and method walk(), and child
classes Cat and Dog which inherit both of these and then add their own variables
(e.g. tabby and gundog) and methods meow() and bark(). These may be overriden,
for example the Cat class may provide its own definition of the walk() method.
Polymorphism is where a the actual function definition used is different depending
on the type used. This is very common in R code, where print() and plot()
and summary() all do different things depending on the type they are passed. Try
making a linear regression with model <- lm(y ~ x) and running these functions on model. If
you pass these functions a data.frame or a phylo object they will all still run,
but be running different functions.
A practical example: Gaussian blur
As our exercise, we will use rust to apply a Gaussian blur on a grayscale image. You can find a good overview of how to do this here: https://stackoverflow.com/a/1696200
We'll do this in four steps:
- Calculate the Gaussian filter
- Create a struct for 2D arrays (matrices)
- Apply the filter across the image (convolution)
- Putting it all together on a real image
Step 1: Calculating the Gaussian filter
Let's first create a function in main() which makes a Gaussian filter of a given size
radius:
use std::f64::consts::PI;

fn main() {
    let radius = 3;
    let sigma = max((radius as f64 / 2), 1.0);
    let kernel_width = (2 * radius) + 1;

    // We will add the code for this in step 2
    let kernel = PixelArray::zero_array(kernel_width, kernel_width);
    for x in -radius..radius {
        for y in -radius..radius {
            // Calculate the Gaussian density for given x, y
            let density = todo!()
            println!("{x} {y} {density}");
            // We will add the code for this in step 2
            kernel.set_pixel(x + radius, y + radius, density);
        }
    }
}
Add the code to calculate the Gaussian density at the given (x,y), using the following formula: \[ G(x, y) = \frac{1}{2\pi\sigma^2}\exp(-\frac{x^2 + y^2}{2\sigma^2}) \]
The value of sigma is set at the start, and the constant PI is already imported.
Step 2: Struct for 2D arrays
The pixels of our image and our filter are both going to be 2D arrays of numbers
which we'll want to be able to access given a pair of (x,y) co-ordinates.
We could use a vector of vectors Vec<Vec<i32>> which can be accessed by a[1][2],
but instead we'll take a more efficient approach of using a single vector
wrapped around rows (recall the row-major format in the first session):
#![allow(unused)]
fn main() {
struct PixelArray {
    pixels: Vec<f64>,
    height: usize,
    width: usize
}

impl PixelArray {
    fn get_pixel(&self, x: usize, y: usize) -> f64 {
        let index = x + y * self.width;
        self.pixels[index]
    }

    fn set_pixel() {
        todo!()
    }
}

}
Try and fill in the set_pixel() function definition to take an \(x\), \(y\) and value
which updates the given pixel. Then create a simple PixelArray, and try getting and
setting some pixel values. You can edit the above code directly, but it may be better
to start your own rust project by running cargo new.
What happens if you pick an \(x\) or \(y\) which is invalid? Modify the functions
to check for these cases and throw an error message using Option:
#![allow(unused)]
fn main() {
struct PixelArray {
    pixels: Vec<f64>,
    height: usize,
    width: usize
}

impl PixelArray {
    fn get_pixel(&self, x: usize, y: usize) -> Option<f64> {
        if x > self.width || y > self.height {
            None
        } else {
            let index = x + y * self.width;
            Some(self.pixels[index])
        }
    }
}
}
Do the same check for set_pixel(), but use panic!() to error in the function
if an invalid x or y is given.
Then, add an empty_array() function to the impl, which should create a PixelArray
full of zeros with the specified size:
#![allow(unused)]
fn main() {
fn zero_array(height: usize, width: usize) -> Self {
    let pixels = vec![0; height * width];
    Self { pixels, height, width }
}
}
Finally, add a function to the impl block which normalises the kernel, making all the values sum to 1.
Step 3: Apply the image across the filter (convolution)
We are now going to apply the blur, which we do using a convolution. For an image, this means running the kernel across the image, multiplying each overlapping pixel value by the corresponding entry in the kernel, and summing these to get the new value for that pixel. This averages across the kernel, with a density given by the Gaussian function.
Once done in the main block, after loading your image (in step 4) you'll sweep over all the pixels row-by-row as follows:
#![allow(unused)]
fn main() {
for y in 0..image.height {
    for x in 0..image.width {
        image.apply_kernel(x, y, &kernel);
    }
}
}
But first we need to define the convolution function apply_kernel(). Add this
as a method to PixelArray in the impl block as follows:
#![allow(unused)]
fn main() {
impl PixelArray {
    // get_pixel(), set_pixel() etc functions here...
    //...

    fn apply_kernel(&mut self, x_centre: usize, y_centre: usize, kernel: &PixelArray) -> f64{
        // NB: this prevents overflow at the edges, but the kernel is not normalised correctly
        let kernel_radius = (kernel.height - 1) / 2;
        let x_min = x_centre.saturating_sub(kernel_radius);
        let x_max = (x_centre + kernel_radius).min(self.width - 1);
        let y_min = y_centre.saturating_sub(kernel_radius);
        let y_max = (y_centre + kernel_radius).min(self.height - 1);

        let mut pixel_value = 0.0;
        for x in x_min..=x_max {
            for y in y_min..=y_max {
                let kernel_val = kernel.get_pixel(x + kernel_radius - x_centre, y + kernel_radius - y_centre);
                // Add to the pixel value by multiplying the pixel value at (x,y) by kernel_val
                todo!();
            }
        }
        pixel_value // return the result of the convolution at that pixel
    }
}
}
When you are using a usize, saturating_sub() will mean any subtraction which would be \( < 0\) will be truncated at zero
rather than causing an error. The first five lines therefore find the range of pixels
surrounding the centre pixel which don't overflow outside the boundary. (We are
ignoring that at the edges we are missing some of the kernel).
Complete this function in so that pixel_value is summed correct in the inner loop,
and at the end so that pixel_value is assigned to the correct pixel in the image
by calling .set_pixel().
Step 4: Putting it all together on a real image
Let's blur the following image, which for simplicity is in black and white:
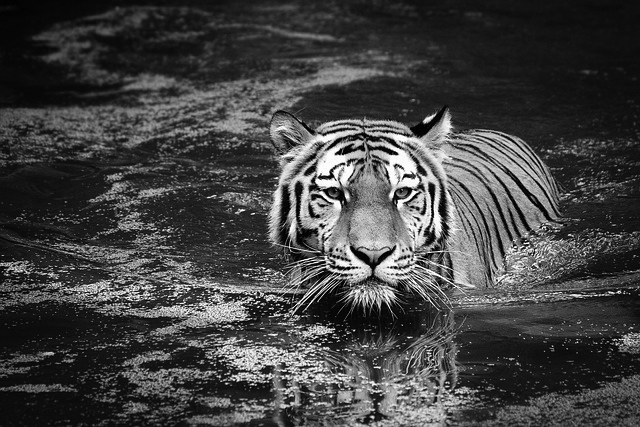
This is a bitmap, which is just an array of pixels plus some metadata, almost identical to your PixelArray
struct. The values are u8 rather than f64, but are also stored in row-major order with a width and height.
Right click the image and save this into your rust project directory.
Rather than working out how to load and save bitmaps, we'll use the bmp package. To
use this add to your Cargo.toml:
[dependencies]
bmp = "*"
and add:
#![allow(unused)]
fn main() {
extern crate bmp;
use bmp::Pixel;
}
at the top of main.rs. Using packages is usually this easy, as cargo will deal with
downloading and compiling them for you. We'll go into a bit more detail at the end.
Using the package is easily and maps very well onto your existing struct. You can read
the package docs to work out how to load and save bitmaps, or just add the following
functions I made earlier to your impl (click the arrow to expand)
Loading and saving bitmaps
#![allow(unused)]
fn main() {
impl PixelArray {
    fn from_bitmap(file: &str) -> Self {
        let img = bmp::open(file).unwrap_or_else(|e| {
            panic!("Failed to open: {}", e);
         });
        let mut image_array = Self::empty_array(img.get_height() as usize, img.get_width() as usize);
        for y in 0..image_array.height {
            for x in 0..image_array.width {
                let px = img.get_pixel(x as u32, y as u32);
                let px_avg = px.b as f64; // Just take a single pixel, as r,g,b are all the same in a B&W image
                image_array.set_pixel(x, y, px_avg);
            }
        }
        image_array
    }

    fn to_bitmap(&self, file: &str) {
        let mut img = bmp::Image::new(self.width as u32, self.height as u32);
        for y in 0..self.height {
            for x in 0..self.width {
                let px_val = (self.get_pixel(x, y)) as u8;
                let px = Pixel::new(px_val, px_val, px_val); // Set r,g,b all the same for B&W
                img.set_pixel(x as u32, y as u32, px);
            }
        }
        img.save(file).unwrap_or_else(|e| {
            panic!("Failed to save: {}", e)
        });
    }
}
}
To get this all to work, add to your main() function after the kernel is set up:
- Load the tiger image using
PixelArray::from_bitmap("tiger.bmp") - Add the convolution loop in from above which calls
.apply_kernel()over every pixel. - Save the blurred image using the
.to_bitmap()function.
You can then run your program with cargo run. If it works, it should look like this:
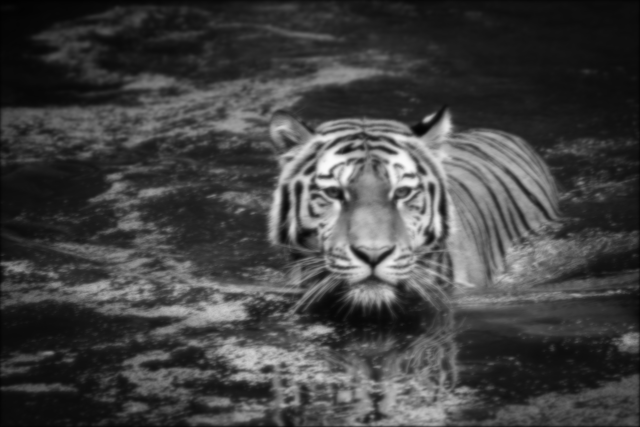
Try with different radiuses of blur and see what happens.
Is there any difference in runtime between the debug and release versions?